Install Shelves On Top Of The Kitchen Cabinet - More ideas below: #KitchenIdeas #KitchenSink Copper Corner ... : A floating floor goes in after the cabinets.
Install Shelves On Top Of The Kitchen Cabinet - More ideas below: #KitchenIdeas #KitchenSink Copper Corner ... : A floating floor goes in after the cabinets.. Essentially, you want to measure the depth of the cabinet. Now, predrill through the top framing piece into the wall studs (as shown) and secure the cabinet into place with screws. Step 6 fill in the nail divots and joints. The problem is the face board of the cabinet protrudes about 3/16 out the sides. And the newer vinyl planks are having issues with this reduced expansion gap.
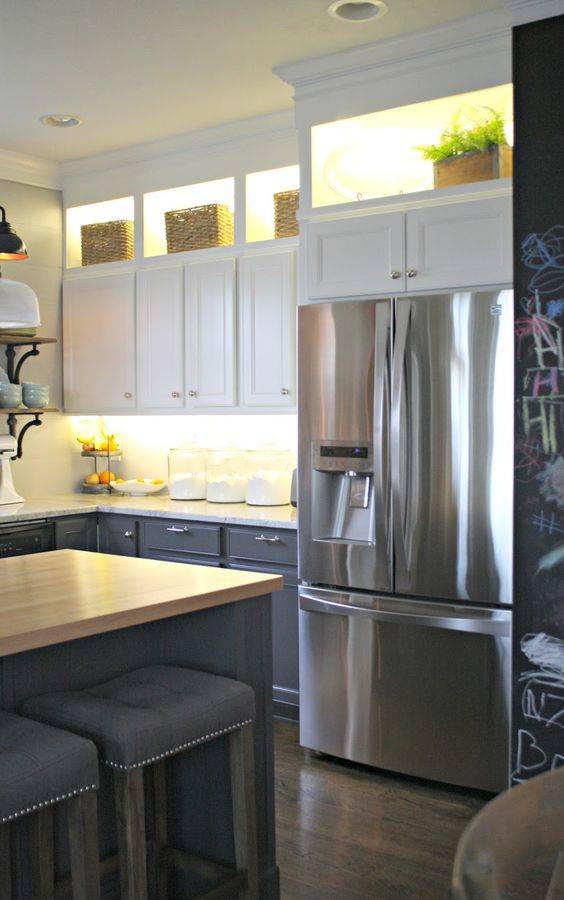
The cleats under the shelf are fillers to elevate the shelf just enough so the crown molding fits under the shelf and yet comfortably clears the doors below. My question is, what do you put under the cabinets to raise. (as all cabinets do.) i'm going to use 1 x 2 clear pine as a cleat to nail the moulding to, but, here is my problem: Essentially, you want to measure the depth of the cabinet. I'm putting crown moulding on the tops of kitchen cabinets.
Kathryn J. LeMaster Art and Design | Rustic kitchen decor ... from i.pinimg.com Repeat this process until all of the base cabinets are installed. Why pay top dollar for imported hardwood that remains hidden? This piece should be at least 2 inches wide and about ⅛ inch thicker than the total thickness of the flooring, including any vapor barrier or cushion. The cleats under the shelf are fillers to elevate the shelf just enough so the crown molding fits under the shelf and yet comfortably clears the doors below. Installing crown molding on kitchen cabinets is one project that takes a little bit of skill but is totally doable. 4 remove the shelves from the packaging. And the newer vinyl planks are having issues with this reduced expansion gap. Read this buyer's guide for the top picks and also some shopping tips.
Once your top cabinets are installed, move on to the bottom kitchen cabinets.
For example, you can attach spice shelves to the end of the cabinet to get food magazines storage. It's obviously much simpler to install the pieces of 1×2 before you get the cabinets in, but it's doable afterwards. The front moulding will come out flush with the cabinet. And the newer vinyl planks are having issues with this reduced expansion gap. Line it up with the studs, then fasten it in place with 3 in (7.6 cm) cabinet screws in each hole. Essentially, you want to measure the depth of the cabinet. The horizontal line on the wall is your main guide. The cleats under the shelf are fillers to elevate the shelf just enough so the crown molding fits under the shelf and yet comfortably clears the doors below. A ledger is a board that helps support the cabinetry as you work. If you need a refresher on how to take accurate measurements, watch our video on how to use a tape measure. Dry fit your first cabinet into place and check for level across the top. The problem is the face board of the cabinet protrudes about 3/16 out the sides. Line up the top and shim underneath the base, front and back to get it level and plumb.
When installing the top of a cabinet, space the finish nails about 12 to 16 inches apart. Set your base cabinets against the wall where you will install them, and add shims beneath the cabinetry so that its top edge hits the first horizontal line that you drew. How to install kitchen cabinet crown molding. If you install heavy cabinetry such as kitchen cabinets on top, it will inhibit the floor from expanding and contracting, and can lead to issues such as buckling and damaged locking systems. Use a level to ensure your cabinets are installed accurately.
20 KITCHEN CABINET LIGHTING IDEAS - Best Under Cabinet ... from founterior.com This area is an ideal storage space for dish soaps and anything you don't mind being exposed to moisture from the sink. This allows the floor to be installed after cabinet installation, maximizes dishwasher headroom, etc. Read this buyer's guide for the top picks and also some shopping tips. Use a level to ensure your cabinets are installed accurately. There are dozens of sizes and patterns to choose from, and you can even combine multiple moldings for a chunky look. Essentially, you want to measure the depth of the cabinet. 4 remove the shelves from the packaging. The shims will raise the cleats and slides off the cabinet bottom enough to keep the shelf from scraping.
Why pay top dollar for imported hardwood that remains hidden?
In fact, other than completely replacing kitchen cabinets, adding stacks is the best way to achieve dramatic results. Essentially, you want to measure the depth of the cabinet. Once your top cabinets are installed, move on to the bottom kitchen cabinets. When installing cabinets first, you need to tell your cabinet makers/counter top installers of the clearance needed for the dishwasher with the extra added height of the floor. The front moulding will come out flush with the cabinet. (as all cabinets do.) i'm going to use 1 x 2 clear pine as a cleat to nail the moulding to, but, here is my problem: My dad said that it would be much easier to use pieces of 1×2 strapping instead of a 2×4 since it would be lighter and easier to attach. There are dozens of sizes and patterns to choose from, and you can even combine multiple moldings for a chunky look. A ledger is a board that helps support the cabinetry as you work. To keep the floor flush, consider installing a different, cheaper type of flooring. Read this buyer's guide for the top picks and also some shopping tips. Place one of the cleats that you cut from the overview on top of the shims and against the cabinet side. Rest the bottom of the cabinet on the ledger board.
There were so many ways we could have filled in that space above the cabinets. Why pay top dollar for imported hardwood that remains hidden? 4 remove the shelves from the packaging. Crown molding can give your cabinets an extra air of charm and sophistication. Step 6 fill in the nail divots and joints.
How to Install Kitchen Cabinet Hardware. Easy DIY project ... from i.pinimg.com Now, predrill through the top framing piece into the wall studs (as shown) and secure the cabinet into place with screws. The side cleats will overhang on the cabinet side. It'll help balance out a sleek and modern kitchen. Read this buyer's guide for the top picks and also some shopping tips. Line up the top and shim underneath the base, front and back to get it level and plumb. In fact, other than completely replacing kitchen cabinets, adding stacks is the best way to achieve dramatic results. When installing the top of a cabinet, space the finish nails about 12 to 16 inches apart. How to install stacked cabinets over builder's grade… one of the first things that i like to do for a remodel is to add stacks.
Reading the forum, it seems like the right way to install cabinets is at the finished floor height, not directly on top of the subfloor.
If you want to do several layers of shelves, it is best to start with bottom sliding shelves and move to the middle or top only when you know you will have space for several racks. When installing cabinets first, you need to tell your cabinet makers/counter top installers of the clearance needed for the dishwasher with the extra added height of the floor. For example, most of the costly finished hardwood flooring is usually placed sight unseen underneath the cabinets. The shims will raise the cleats and slides off the cabinet bottom enough to keep the shelf from scraping. 1/2″ sanded birch plywood 2′ x 4′ sheet will make approximately 4 shelves (depending on your measurements) birch edge banding. Caulking can be used to fill in the nail divots and fill in the joints of the molding. The best kitchen cabinets improve both the look and functionality of a kitchen. The line on the floor is your secondary guide. Line up the top and shim underneath the base, front and back to get it level and plumb. The easiest way to do this would be to find the studs beforehand and mark a line, if not it's going to be a bit. Repeat this process until all of the base cabinets are installed. In fact, other than completely replacing kitchen cabinets, adding stacks is the best way to achieve dramatic results. Drill the holes and set the corner cabinet in place.